

How To Set Up a GitHub Action to Update the README File in All Your GitHub Repositories


This post was originally published as part of my submission for the 2021 GitHub Actions Hackathon on dev.to. Please consider also showing some support there, thanks! 💖
Go straight to the code:
README Files in Brief and How to Set One Up
Why You Should Have a README File in Your GitHub Repositories
As you continue to build out your portfolio with projects on GitHub, it's a good idea to include a README at the root of each project to describe what the project is about and how it was built. This is useful for anyone who comes across your project—other developers, recruiters, or even your future self—to get a quick understanding of the project and your process. Personally, it is also a great reflection tool, since I usually write them after a project has been completed.
How to Write a README File for Your Project
But of course, you don't always have to do this from scratch. Resources, such as GitHub README Templates, allows you to view README layouts for different sites, which can give you an idea of how to format your own README. A simple Google search for "github readme template" will also bring up a number of templates in repositories that you can just fork for yourself.
As the title of this post suggests, a full breakdown of a README for your project is beyond the scope of this post. To help you get started, I recommend reading Tracy Nuwagaba's article, How to write a readme for your GitHub project. If you're like me, you can pick your favorite template and tweak it to fit your needs.
Bonus Tip: Load the template as a snippet in VS Code
If you use VS Code as your main code/text editor, you can save your own snippets to reuse chunks of code in different places.
Follow these directions to save the template as a custom snippet in VS Code. You can also use this snippet generator to easily format the code snippet.
Problem: Updating Older README Files with Newer Content
As previously mentioned, I use the same README template for my projects, which includes a section for "Other Projects" and links to the repos of my other projects. (This is a not-so-secret technique to keep the user clicking through my GitHub portfolio 😏)
Naturally, in my older projects, there were links to even-older projects. As I continue learning, I've built more projects and want to make sure the most recent and polished projects are always on display. But who wants to go through the other ~20+ repositories to update EVERY. SINGLE. README. FILE. 😵 Definitely not me.
Using the tried-and-true method of Googling to see if anyone else has encountered this issue, I came across Eugene Yan's article, How to Update a GitHub Profile README Automatically. He also cites Simon Willison, who achieved a similar task of building a self-updating profile README for GitHub.
Both of these were done with GitHub Actions, which I'd never heard of until then. And while this sounds like a really neat integration for the GitHub Profile README, it wasn't quite what I needed. But I thought maybe I could still use GitHub Actions to solve my problem.
Solution: GitHub Actions to Run a Script that Interacts with the GitHub API
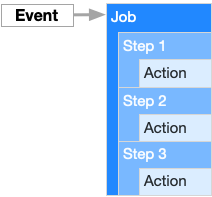
In short, GitHub Actions are automated workflows that run based on triggers to perform a set of jobs. (For JavaScript folks, it's like addEventListener for GitHub 😅) From pushes, to pull requests, to issues, a GitHub Action can be attached to those events, which will trigger the action and the job(s) will run.
Again, I'd never heard of GitHub Actions before, so I had to spend a lot of time reading the documentation and other people's code.

It turned out to be simpler than I thought, especially since I figured out you could write a script that you set up the action to run.
Step-by-Step Instructions to Setting Up the GitHub Action
GitHub Actions uses YAML, which this tutorial doesn't require you to know a lot of. (Personally, I relied on the documentation and Eugene and Simon's code for this part.) But the main script is written in JavaScript and uses Node.js, so some knowledge of both is helpful.
Go straight to the code:
Step 1: Set up your project in your local environment
First, set up your project on your computer or other work environment.
💡 If you're not particularly tied to one editor or don't have a local environment, you can still code in the browser! Check out my article on browser-based code editors: Three Levels of Code Editors in the Browser.
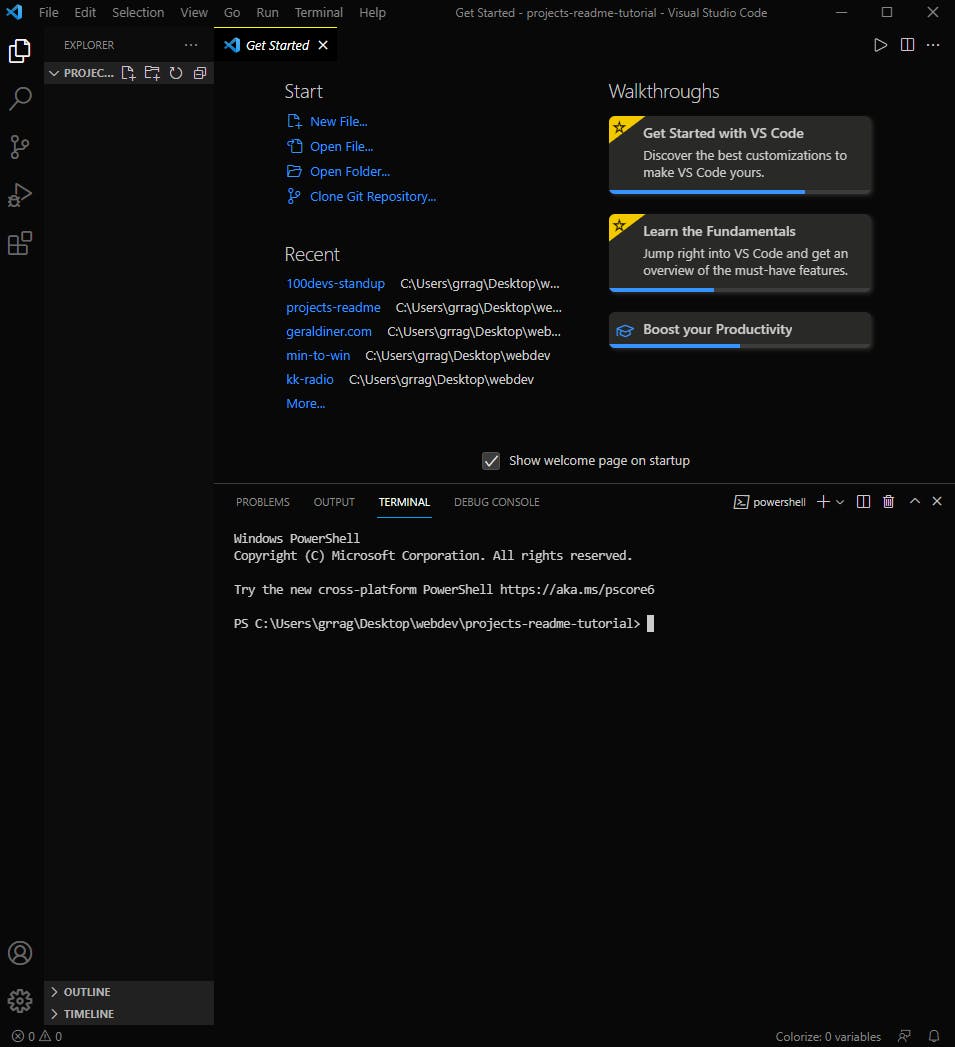
For this tutorial, I have a directory called projects-readme-tutorial and I'll be using VS Code as my code editor.
Step 2: Initiate a Node.js project with npm init and install dependencies
Next you have to initiate a Node.js project and install dependencies via a Terminal or Command Prompt.
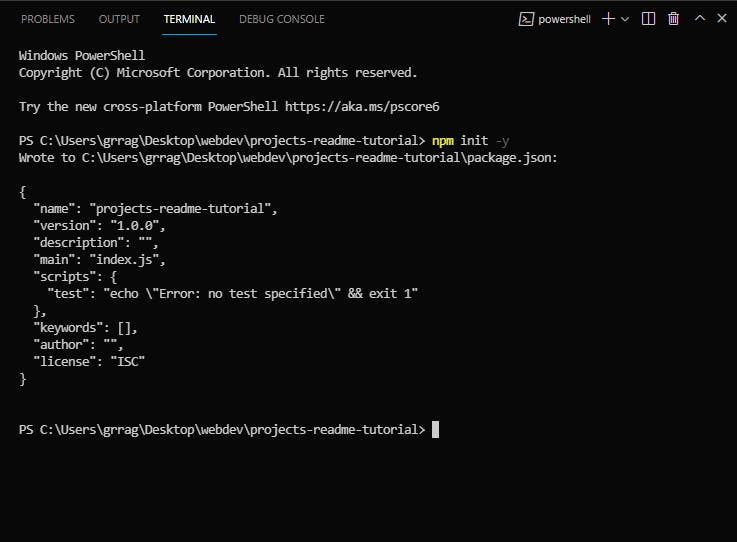
In VS Code, you can open the terminal by going to Terminal > New Terminal. You can use npm init, which will take you through a series of questions to initiate your project, or use npm init -y to use all the default configuration settings.
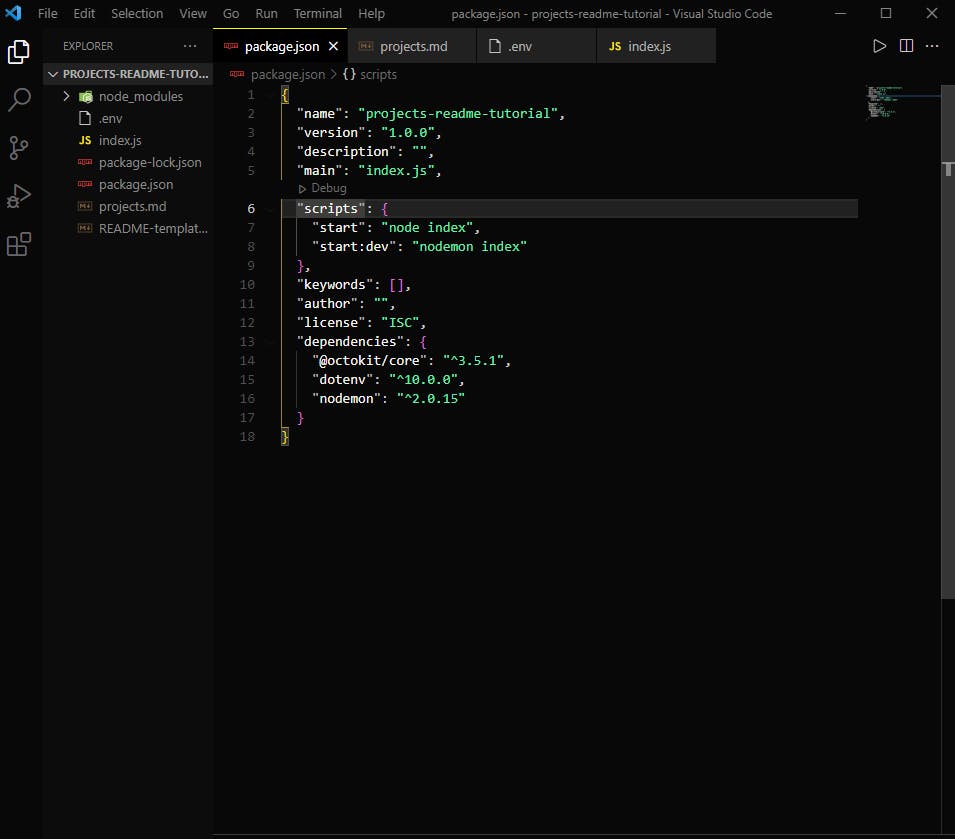
Here, I used npm init -y and a package.json file was created in the directory.
Now you can install some dependencies for this project.
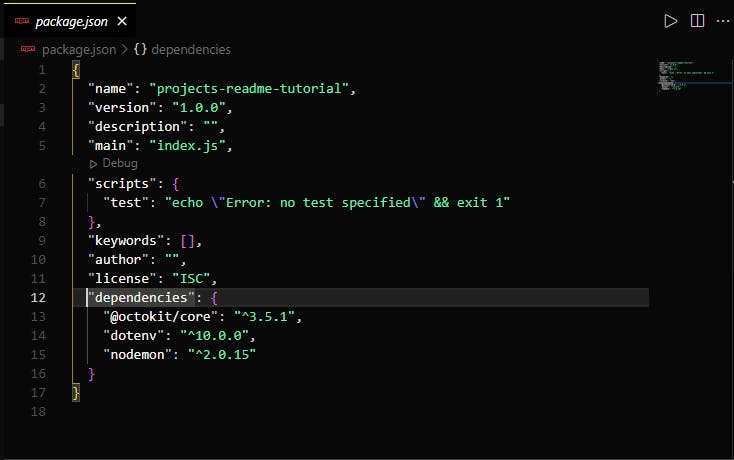
For this project, you'll need the following dependencies:
- @octokit/core - For accessing the GitHub API
- dotenv - For loading environment variables (such as a GitHub Personal Access Token) and keeping them secret when you push to the repository
- nodemon (optional) - For automatically restarting the node application when files are changed. I like to use this for quick and easy testing/debugging so I don't have to stop and start the server every time I change a file.
Run the following line in your terminal to install the dependencies:
npm i @octokit/core dotenv nodemon
Your package.json file should be updated with the dependencies you just installed. We'll come back to this in a bit to update the scripts.
We'll also be using fs for file system access, but that's already integrated with Node.js.
Step 3: Set up the file that holds the text to update all the README files
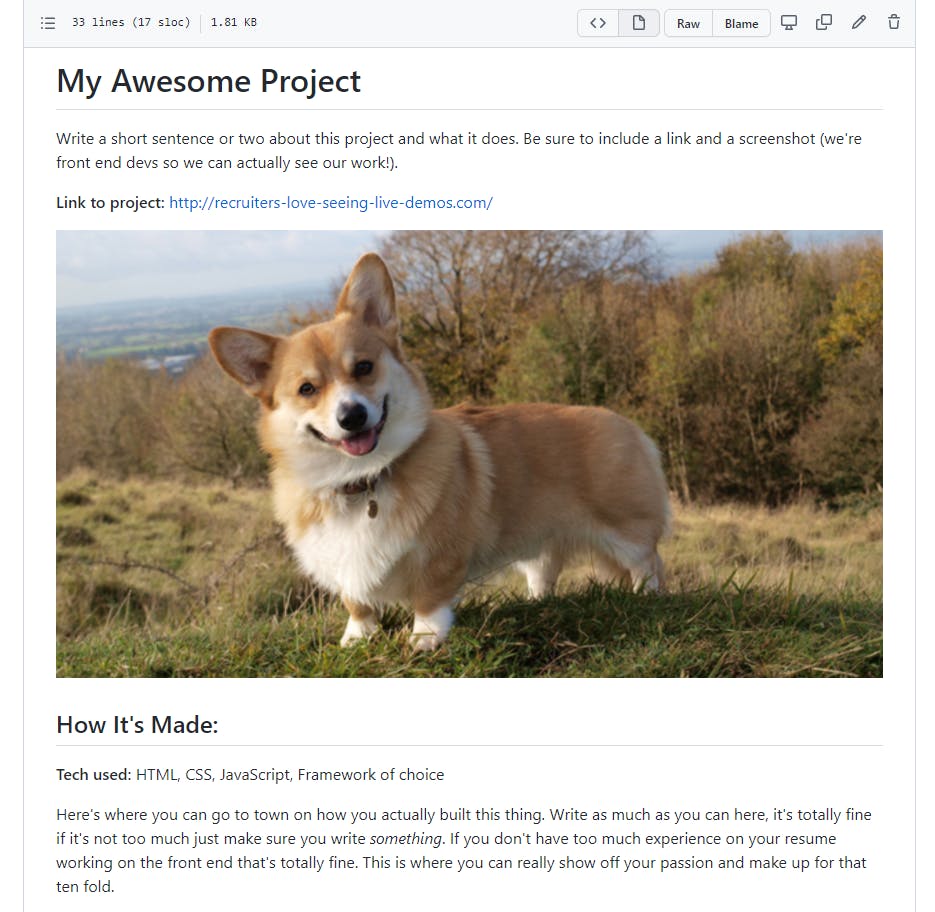
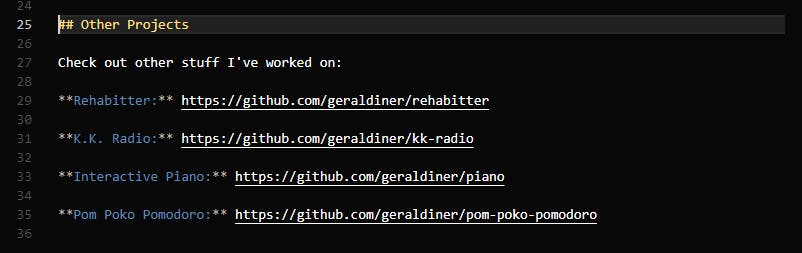
Now you'll create the file that holds the text that will replace all the old text in the README files. This is the dynamic content, such as my "Other Projects" section of my README template.
When creating this file, make sure there is some part that is easily distinguishable from the rest. This is so that in the main script, you can easily look for where the new content should be placed. You could add comments, such as <!-- start dynamic content here -->, but I chose to go by the heading instead. There is no other "Other Projects" heading in the file.
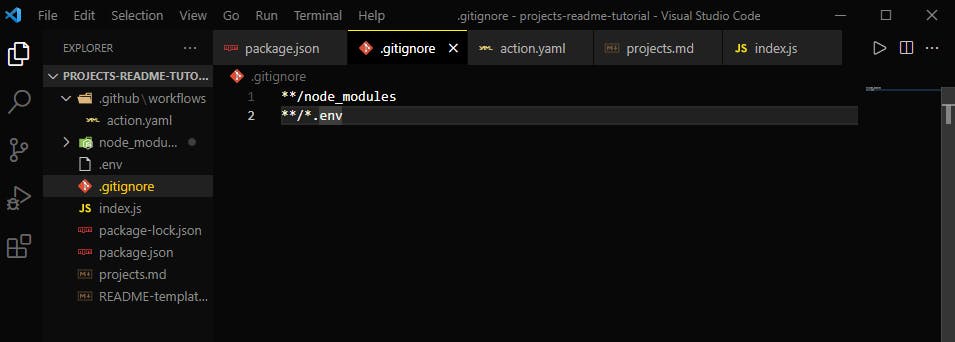
I've created a new file named projects.md and pasted in the content that will replace the old content in the README files.
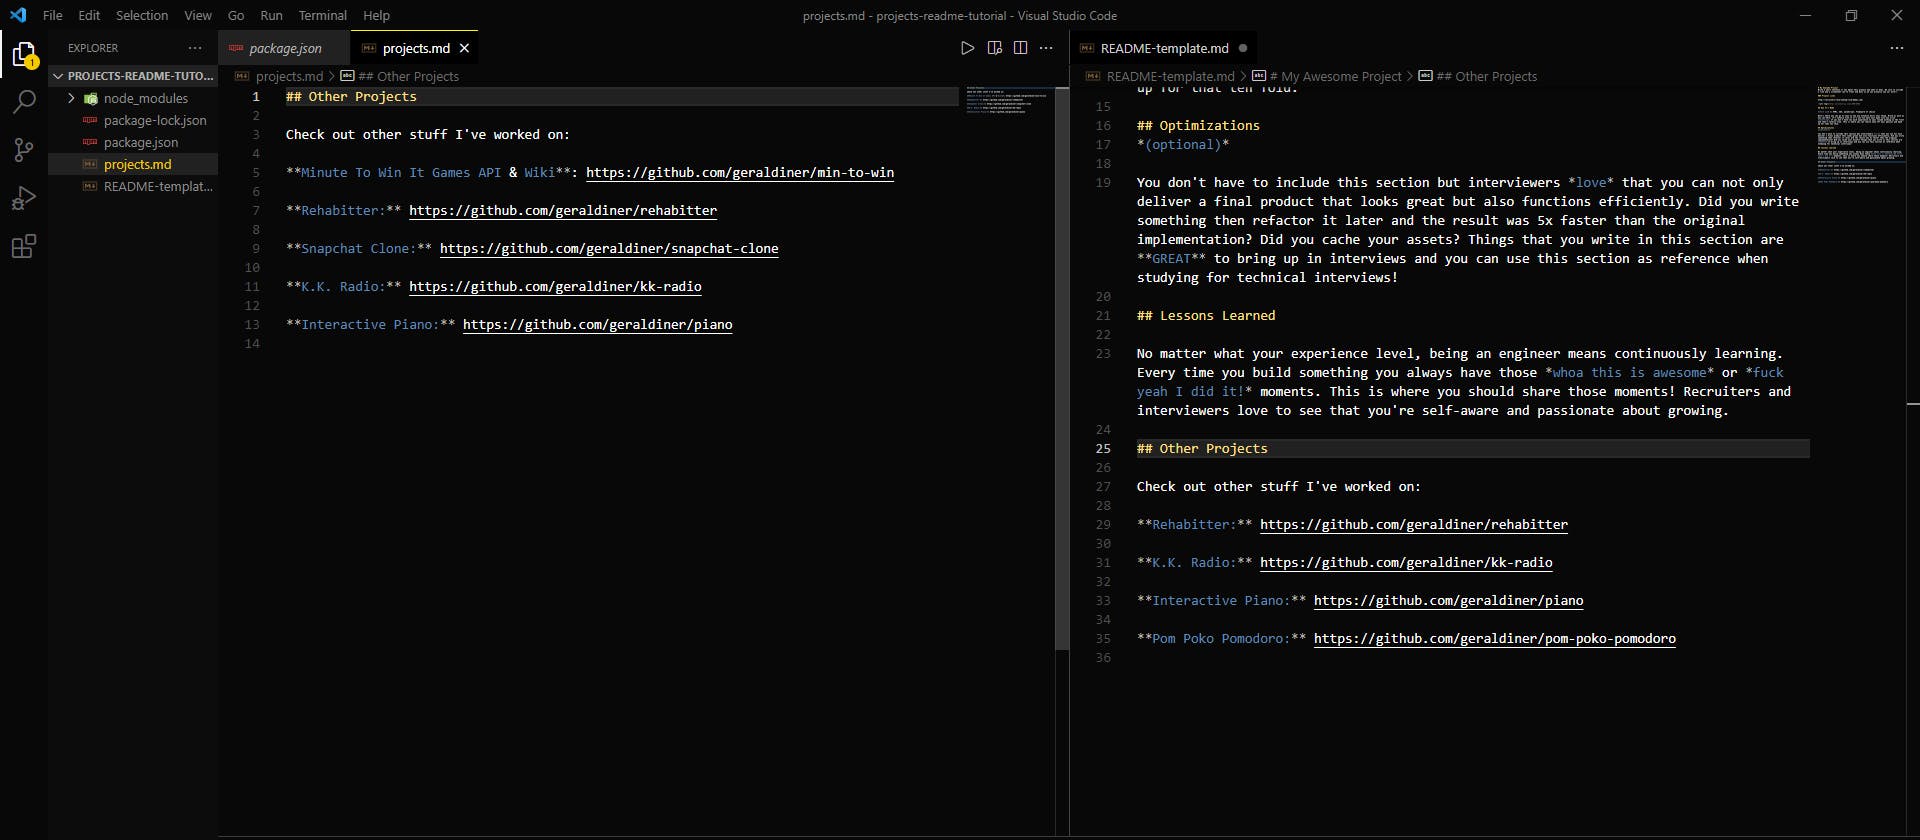
The projects.md file on the left is just the "Other Projects" section from my README template file on the right.
Step 4: Write a script to access the GitHub API and update the README file in all repos
Now comes the meat and potatoes of the project. This is the script that will do all the work in finding the README file in all your repositories, updating the README file with the content from the projects.md file, and pushing the new file and its changes to the repository. If you're looking to do something else with this project, be sure to read the GitHub API documentation.
For anything interesting, we need a Personal Access Token when making requests to the GitHub API. Follow these instructions to get your own Personal Access Token.
Once you've got the Personal Access Token, save it in a .env file in the root of your project folder.
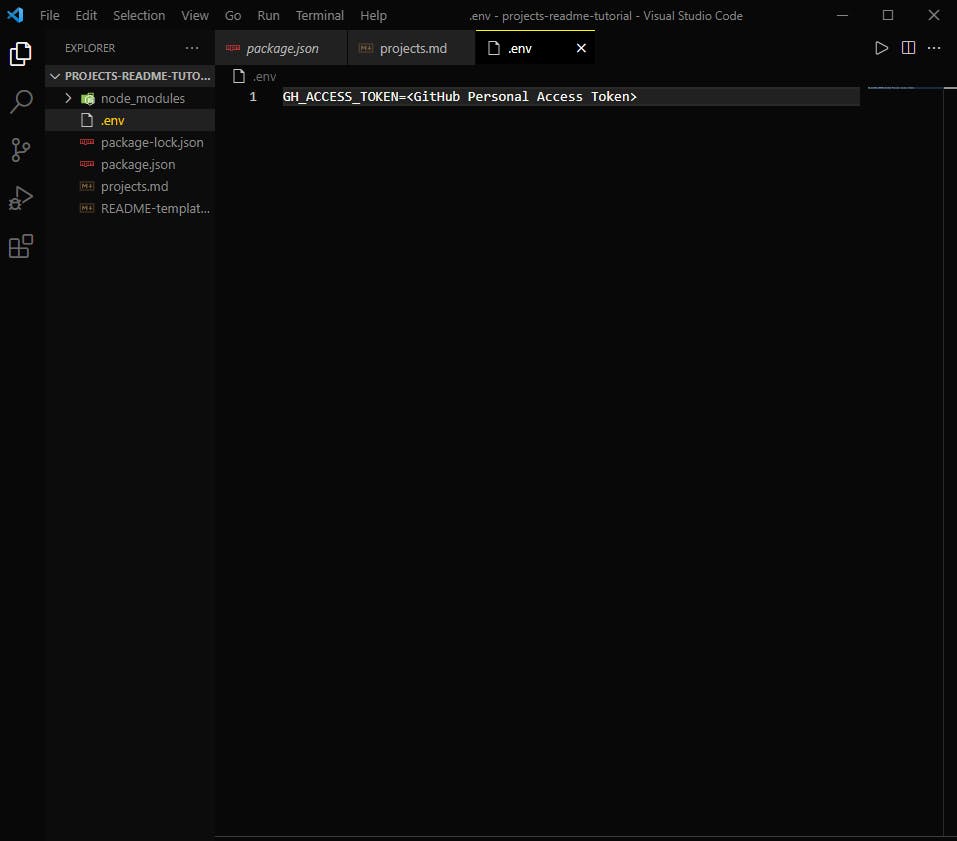
Now, create a file named index.js. We'll need the fs, dotenv, and octokit packages.
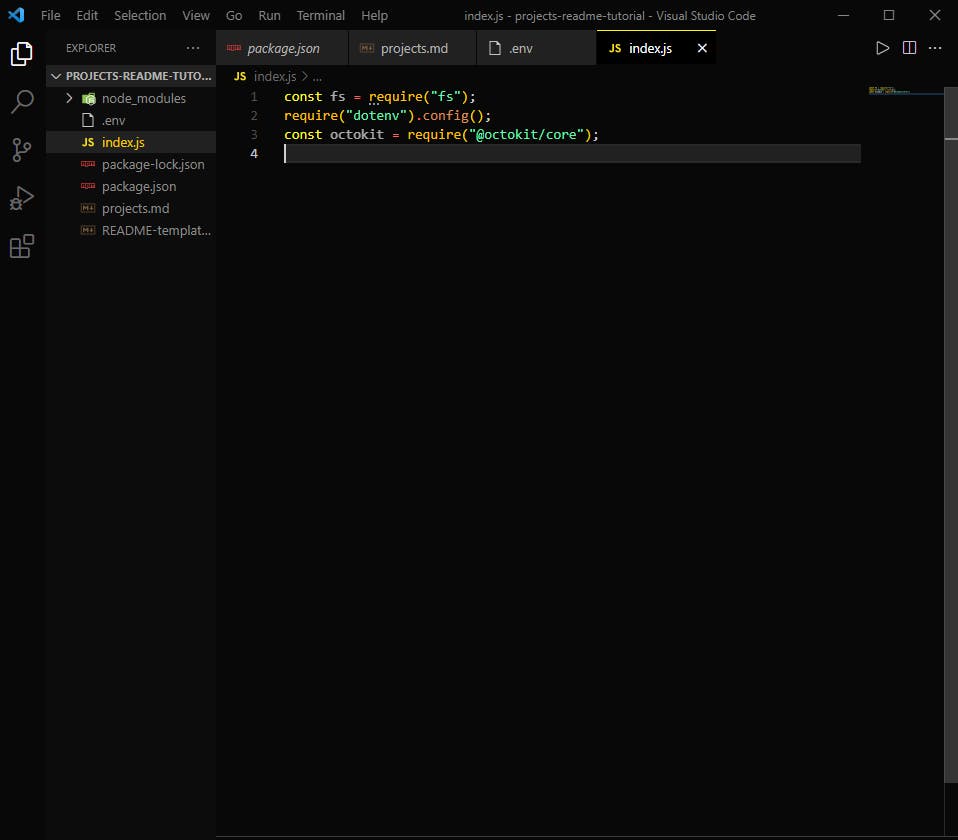
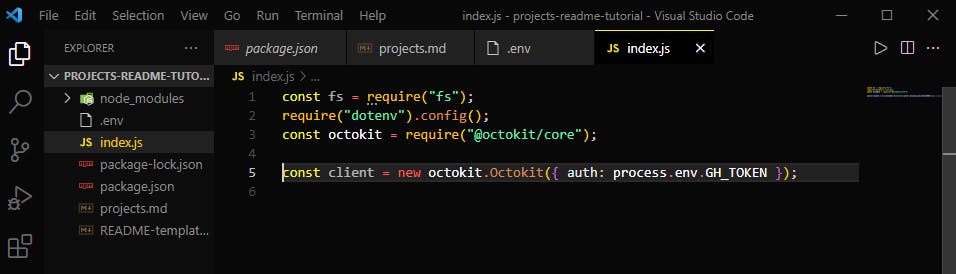
Now, we have to set up the octokit client with our Personal Access Token to access our repos and files. For more information about setting up octokit, take a look at their documentation.
The rest of the file is made up of asynchronous functions that will
- Find all your repos
- Access the current README file (or create one if it doesn't exist)
- Commit the updated/new README file
Find All Your Repos
This part of the script uses the "List repositories for a user" endpoint of the GitHub API.
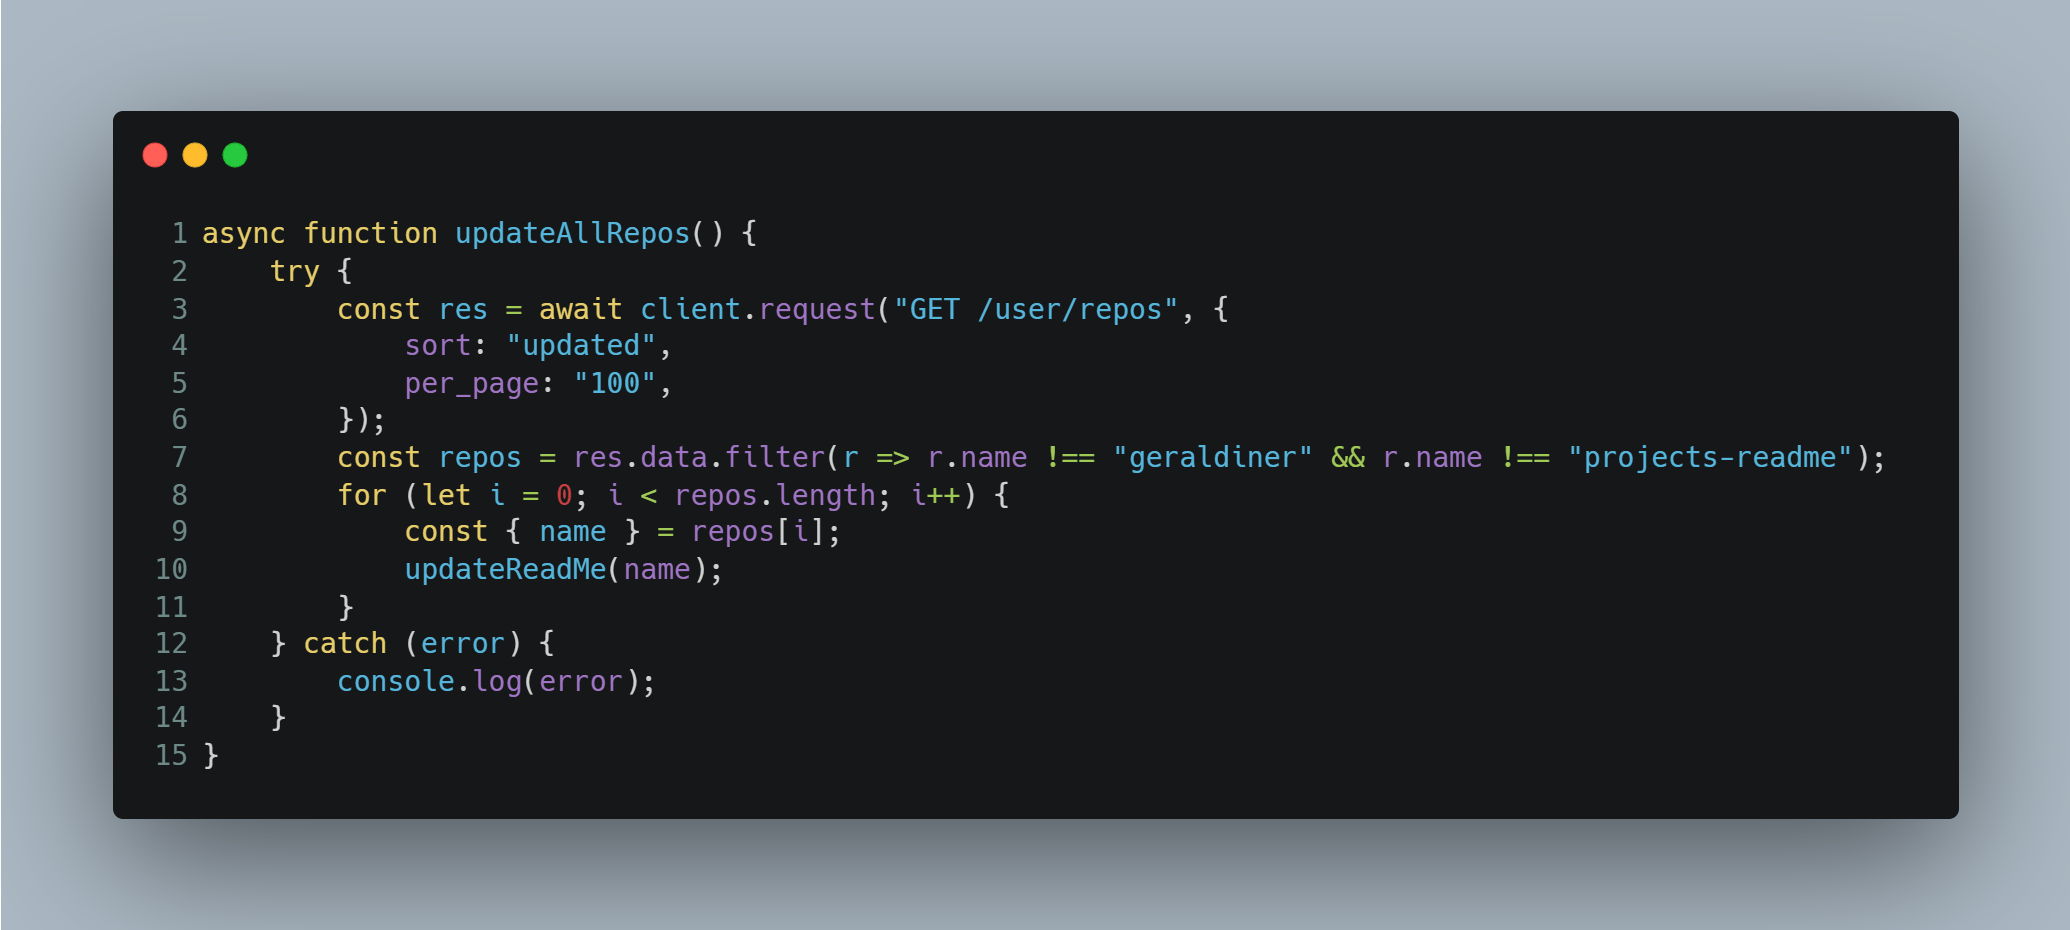
On line 5, note that if you have more than 100 repositories, you'll have to modify the code a bit to cover all your repositories, since the max per page is 100.
On line 7, I take the extra step of filtering out certain repos that I don't want to be updated, including the README file for my GitHub profile and the project itself.
Then, on lines 8-10 a simple for loop goes through each repo to find and access the README file.
Access the Current README file
This part of the script uses the "Get repository content" endpoint of the GitHub API. There are two other endpoints for specifically getting the README file of a directory, but for some reason, I couldn't get those to work. This one was the only one that would successfully retrieve the file (if it existed).
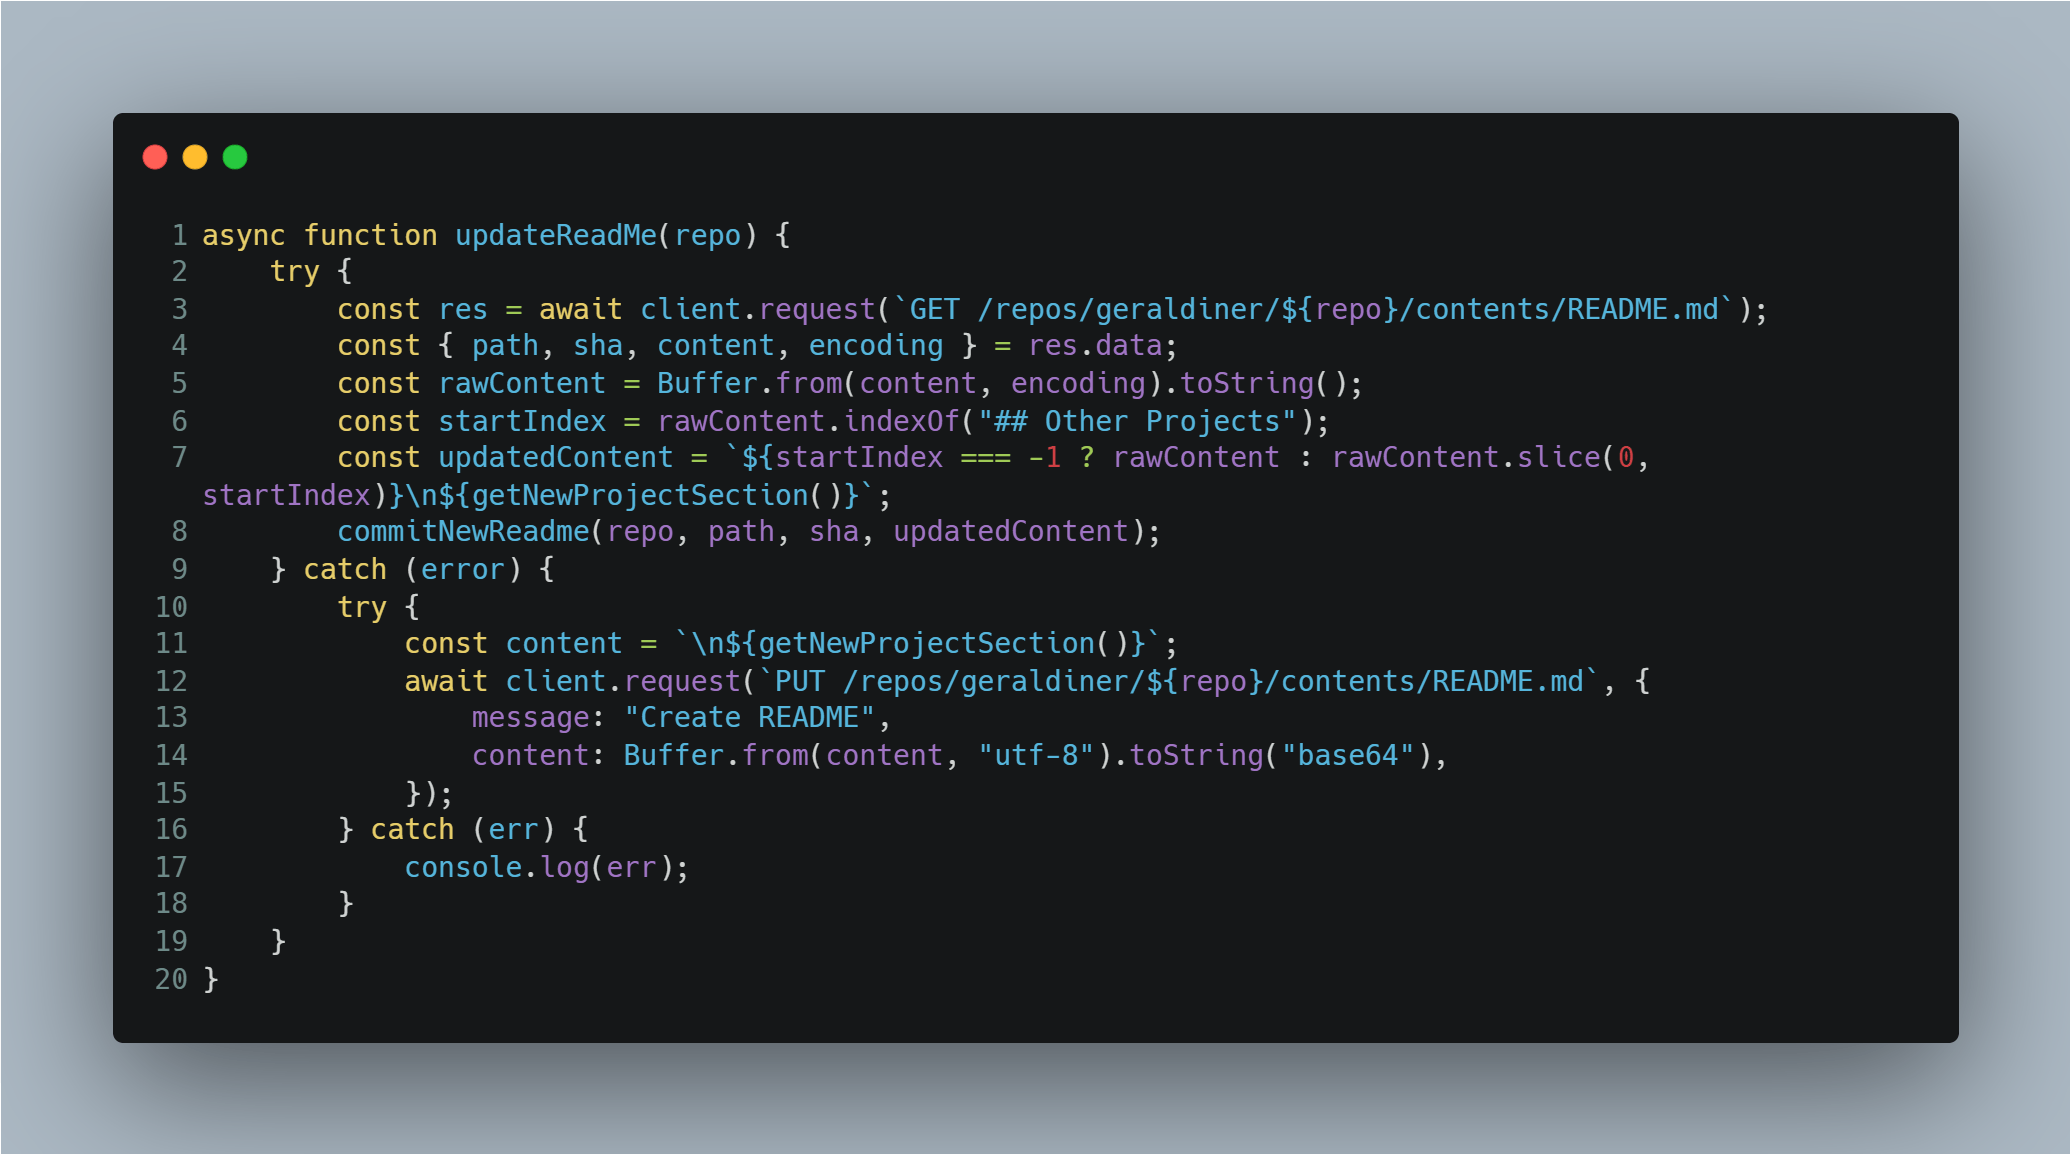
On line 3 is where the actual request is being made.
The data looks something like this 🤯:

But what we're most interested in are the following:
path- the file namesha- the id for the latest commitcontent- the actual content of the README file inbase64encoding- the encoding for the file content
So on line 4, there is some destructuring to isolate those pieces of information.
The lines that follow are for converting the file contents from base64 to a String. Then, it finds the index for the "Other Projects" section heading (remember when I said to make it something easily distinguishable?). With this index, we can use .slice() to only take the first part of the content and concatenate the new content from the projects.md file.
There is a helper function to easily get the new content using the fs package:
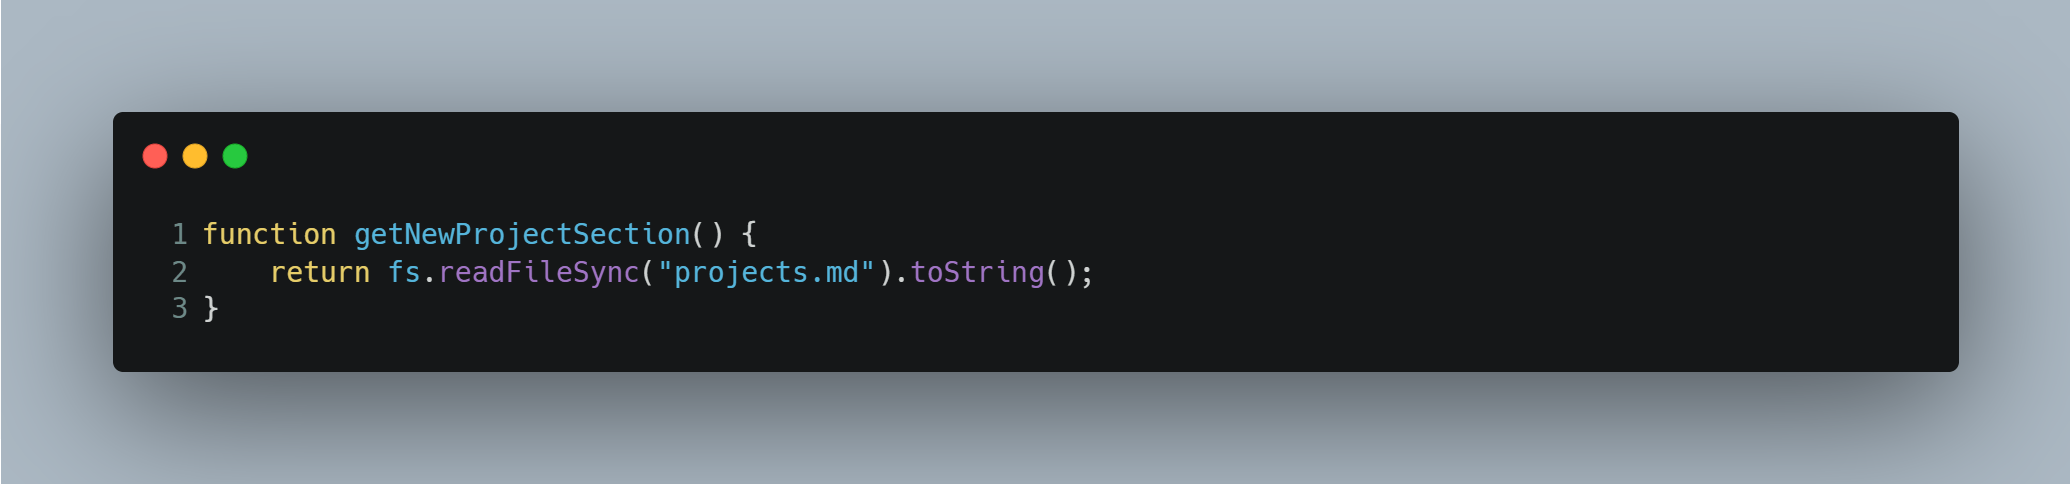
If the README file doesn't exist, it will just create a new one with the content from projects.md.
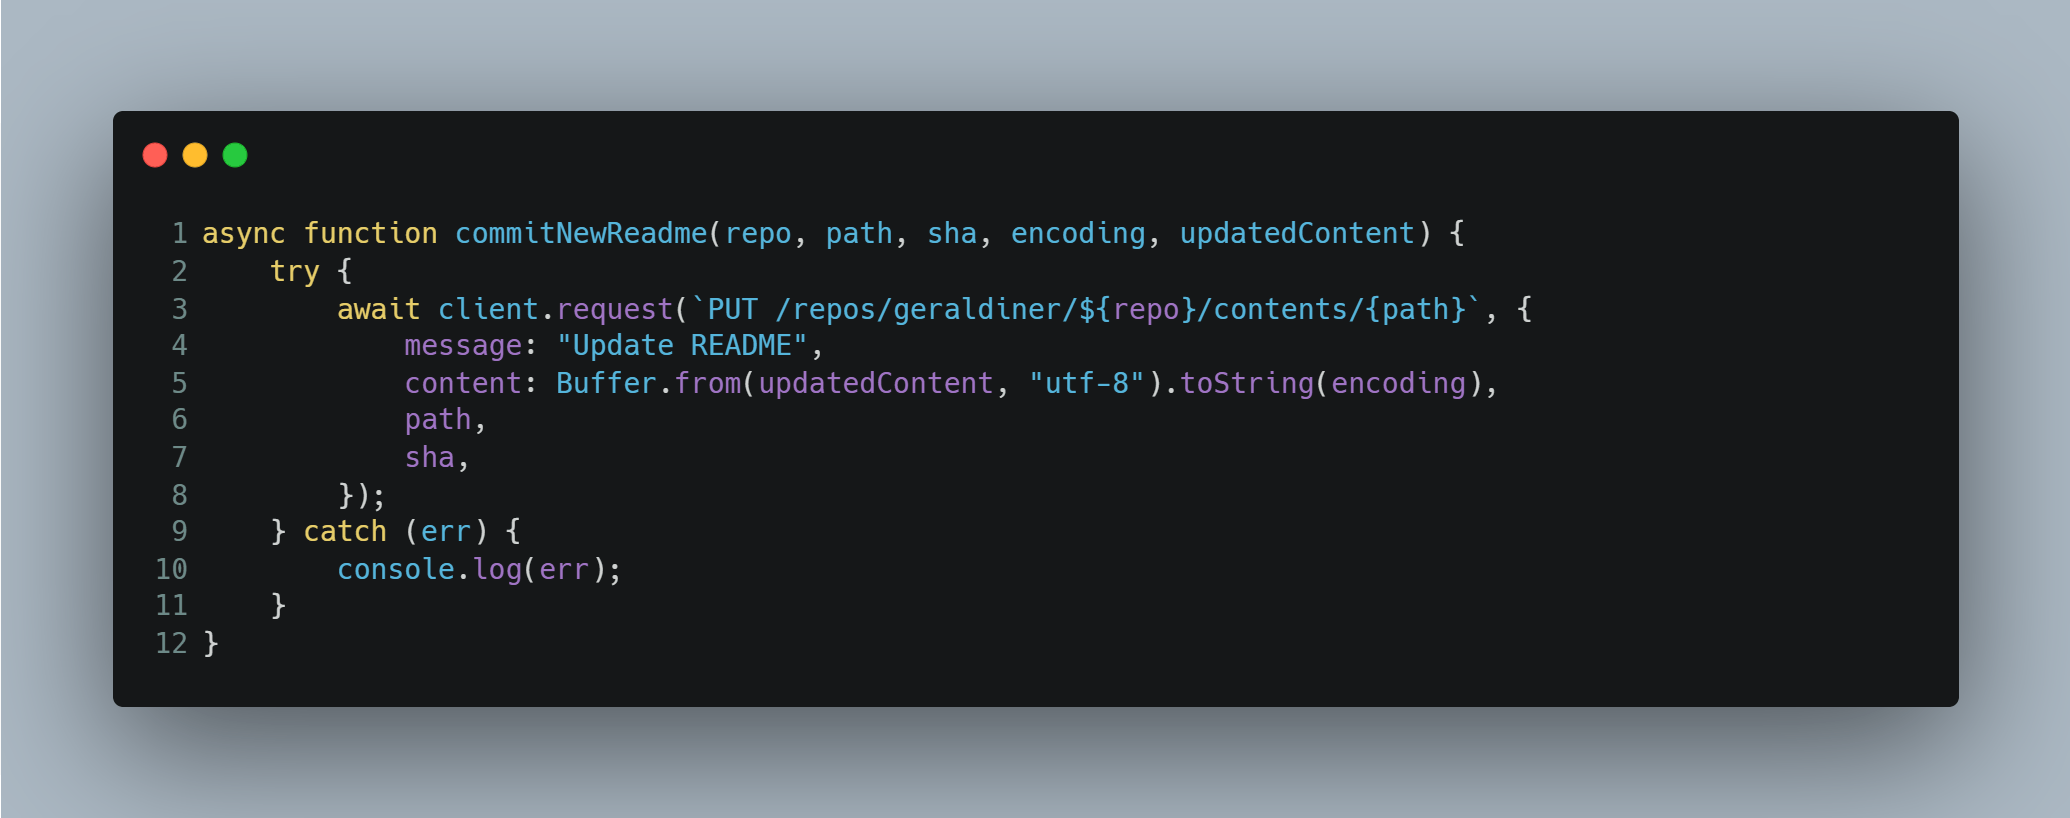
Commit the updated/new README file
Finally, the updated/new README file will be committed to their respective repos. This is where the sha in the previous code segment comes in handy, so that it can replace the newest commit.
This part of the script uses the "Create or update file contents" endpoint of the GitHub API. Using information generated in the previous code segment, it will make a PUT request.
The final script
The final script should look like the code below. Remember that we've only defined functions right now. We need to actually call the main function, updateAllRepos(), so all that work will actually run.

Running/Testing the script
Now that we've got the script set up, you can test it yourself by running index.js with node (or nodemon, if it was installed).
Back in the package.json file, add the following to the scripts section:
Step 5: Set up the GitHub Action in a YAML file
Now that we've got the main script set up, we can work on setting up the actual GitHub Action. GitHub Actions are workflows made of event(s) that trigger job(s). For this GitHub Action, we ultimately want to run the script we just created whenever the projects.md file is updated and pushed to the repository.
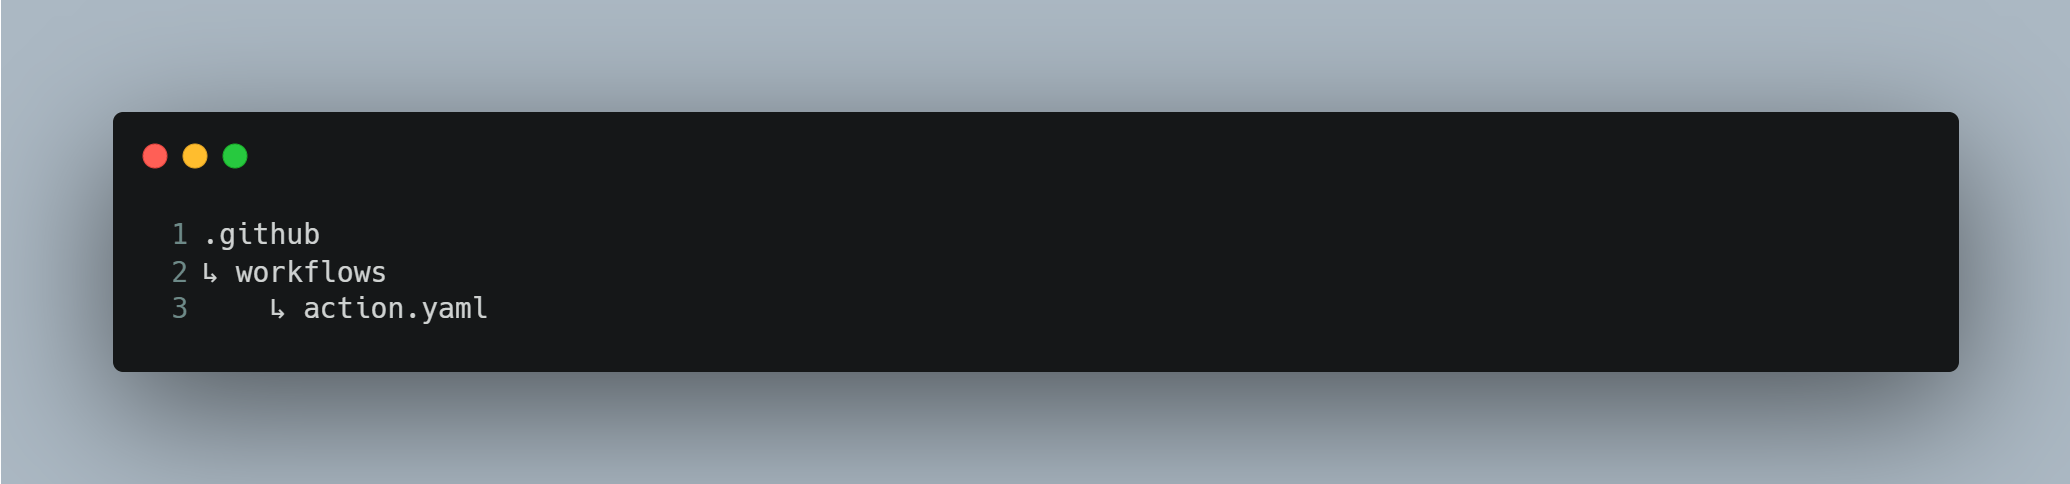
In the root of your project directory, create a folder called .github, and in that folder, create another folder called workflows. In the workflows folder, create a file called action.yaml.
This action can be broken down to the following:
- The event will be a
pushto the repository, specifically for theprojects.mdfile - The main job is to run the
index.jsscript, which is further broken down to the following steps:- Check out the repo
- Set up a Node.js environment
- Install the dependencies
- Run the script
In the action.yaml file, this translates to the following:
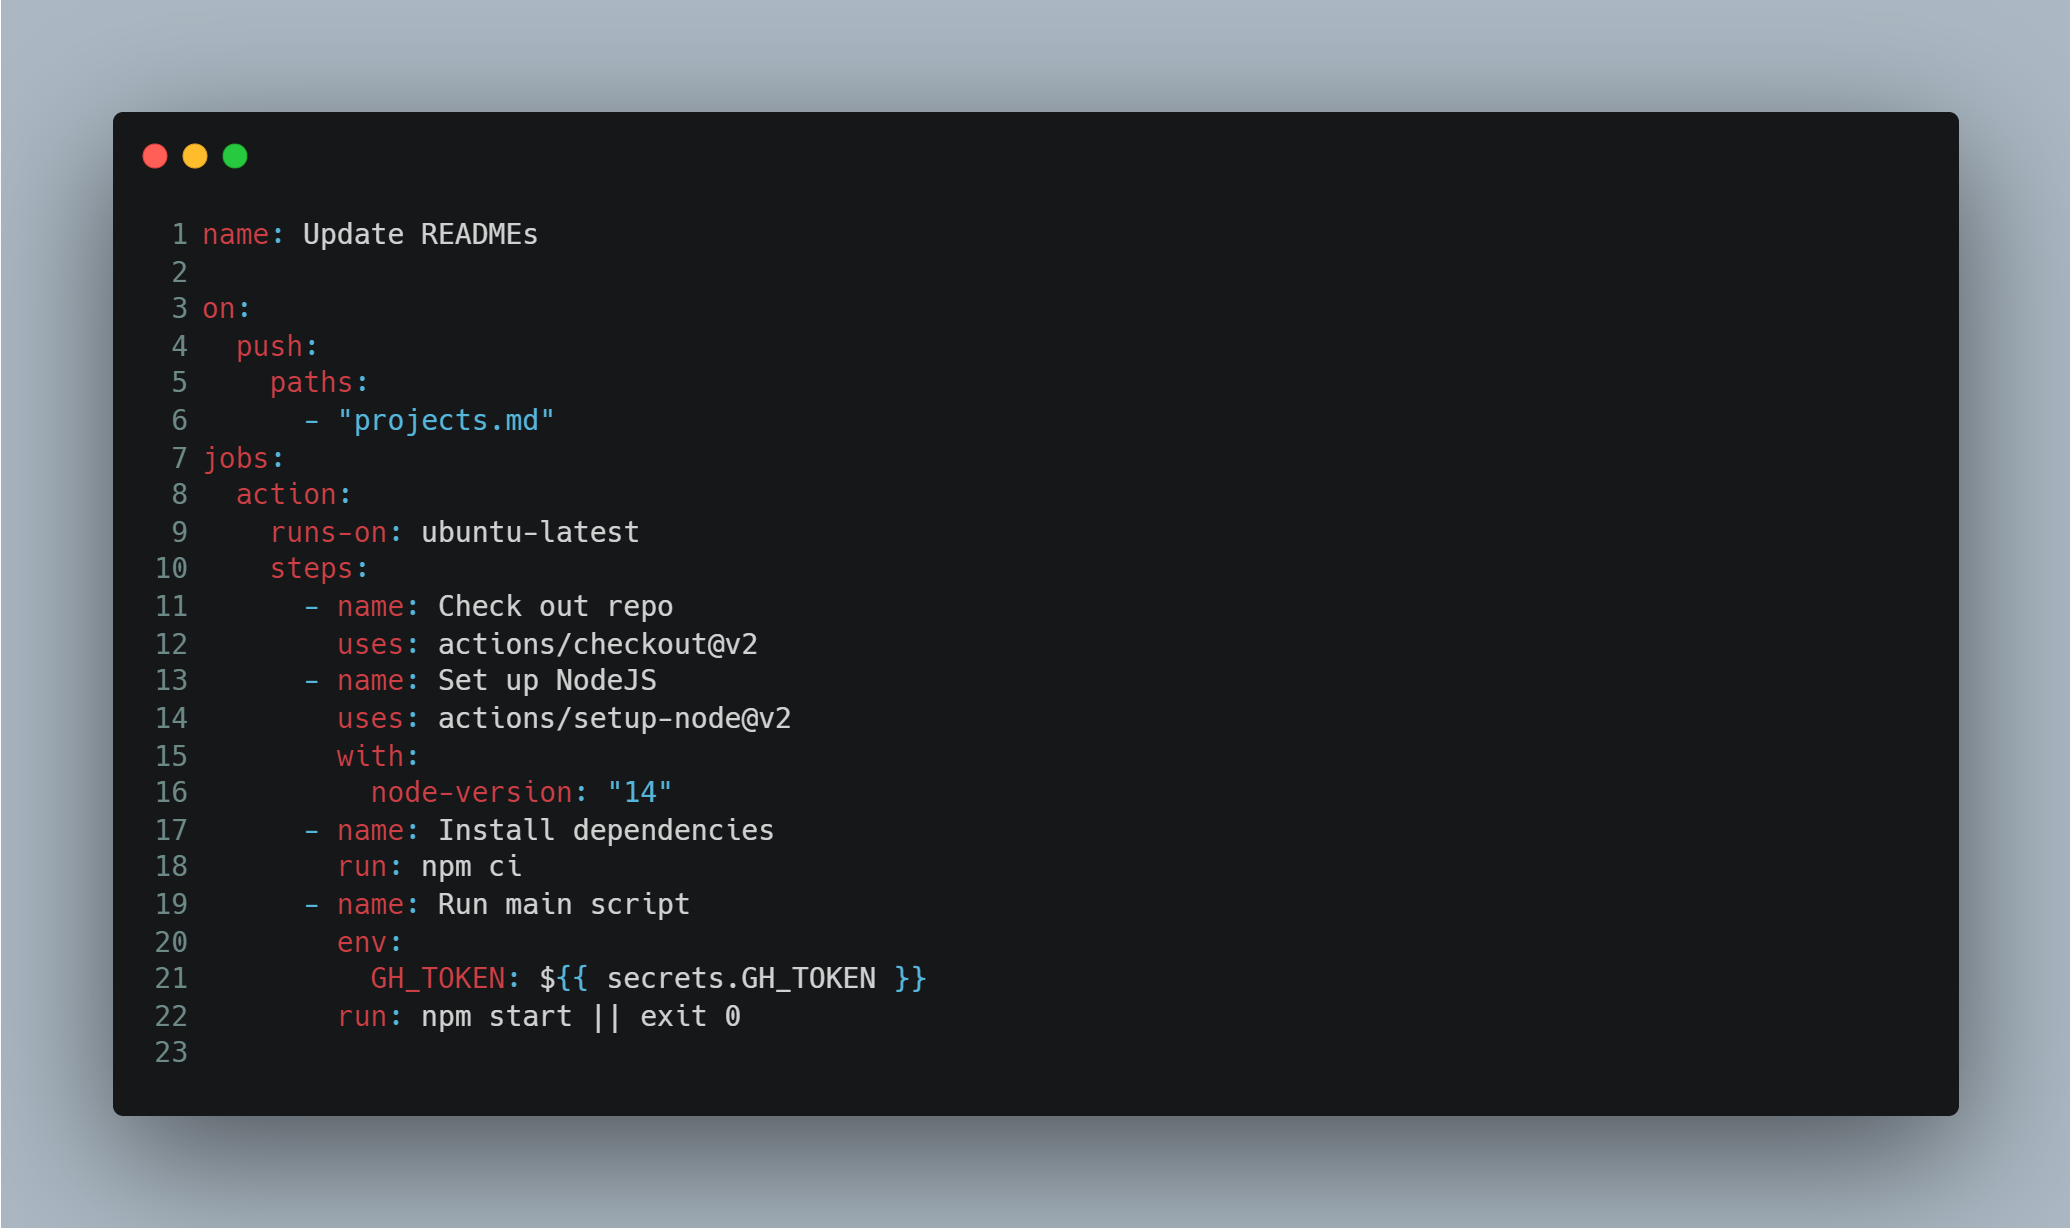
You'll notice on lines 20-21 that we're setting an environment variable called GH_TOKEN, like we did in the .env file. In order for the script to have access to the GH_TOKEN while being run by the action, you need to set a repository secret. Follow these instructions to set a secret for your repository.
You can set any number of environment variables and secrets, and access them the same way.
Step 6: Set up a GitHub repository for where the GitHub Action should live
Now that we've got all our files set up, we can push all our code to GitHub and get the GitHub Action up and running.
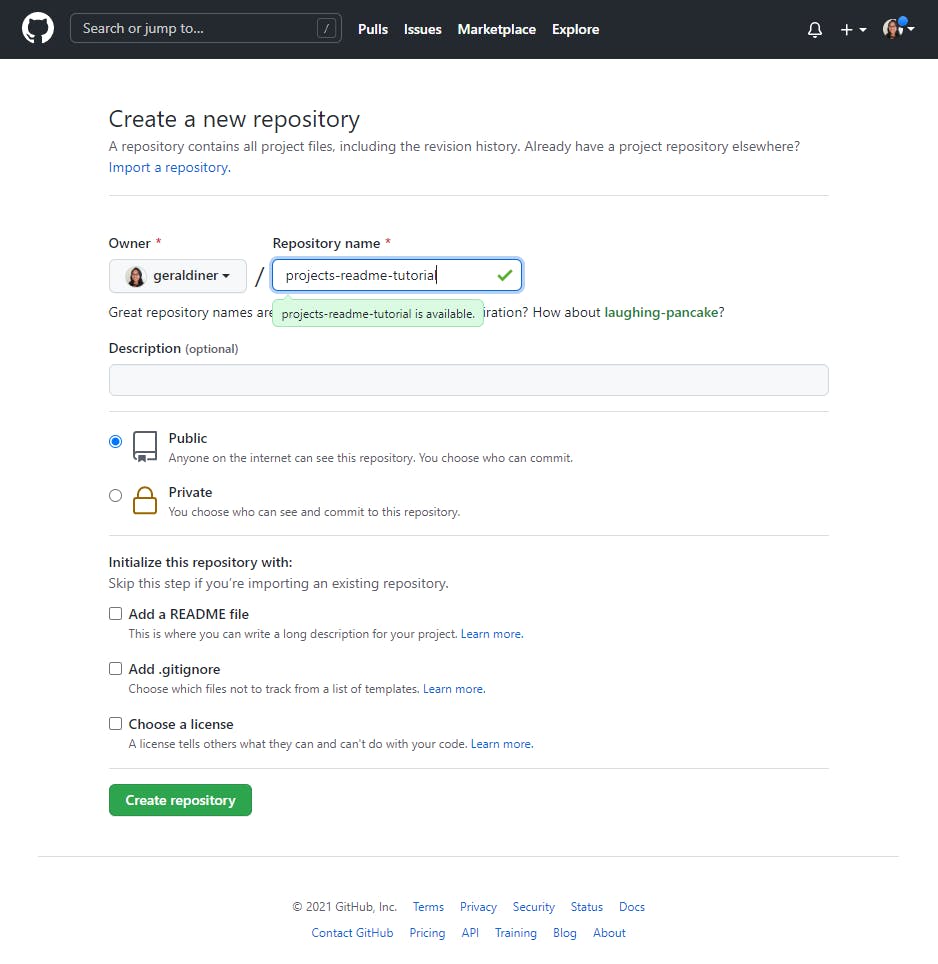
First, set up a GitHub repository to house this project and the GitHub Action.
Then, follow the instructions for "...or push an existing repository from the command line" to connect to your local work environment.

Don't forget to set up a .gitignore file to ignore the node_modules folder and .env file that contains your Personal Access Token.
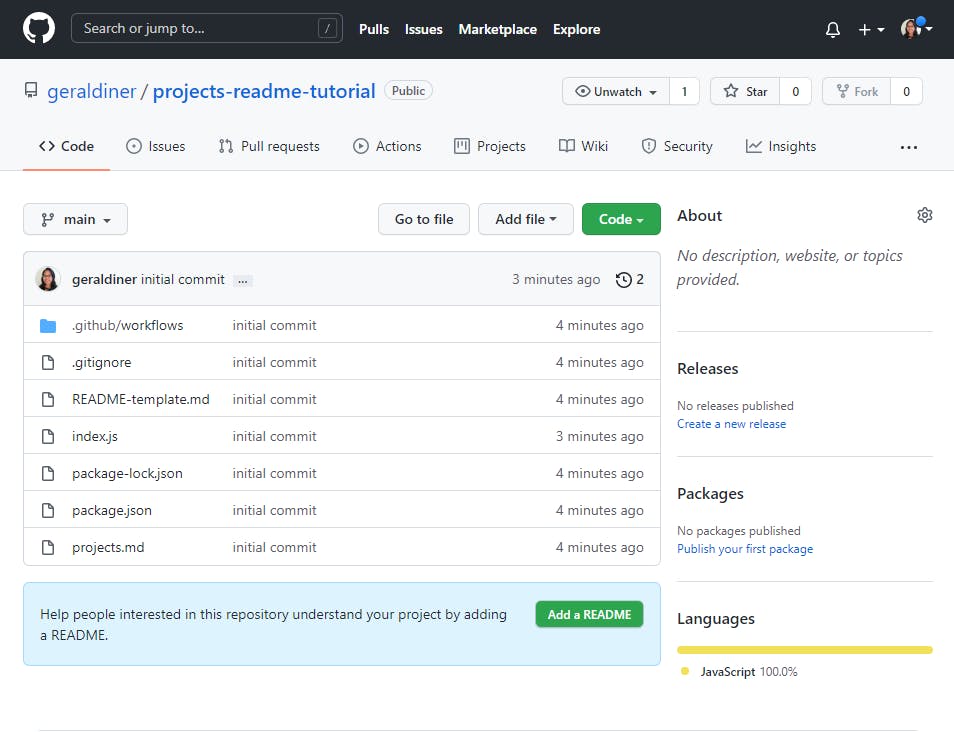
If everything worked out smoothly, you should see your code in the repository.
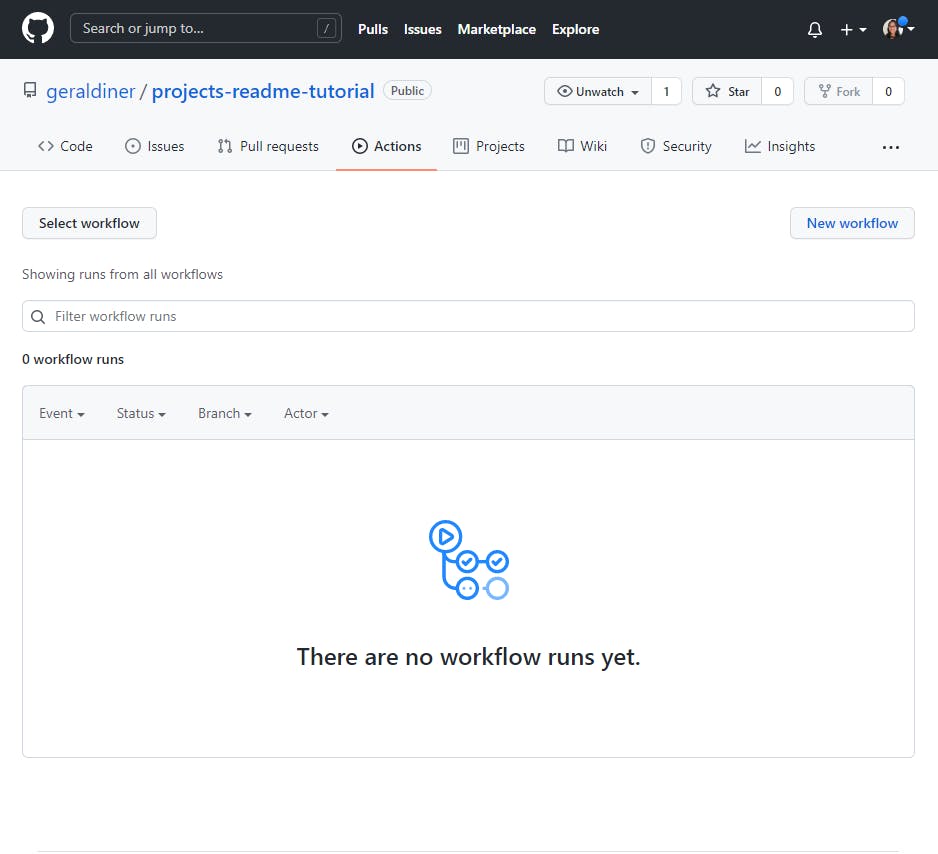
If you go to the "Actions" tab, you might not see anything yet since it's the initial commit.
However, once you make some changes to projects.md and push the changes to the repository, it should run the action.
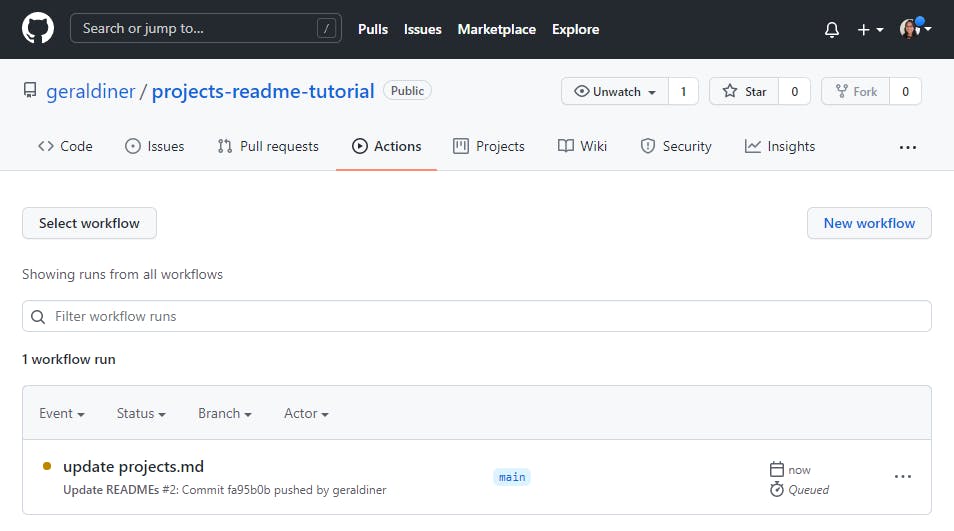
And once the action is completed, you should see your README files updated, like so:
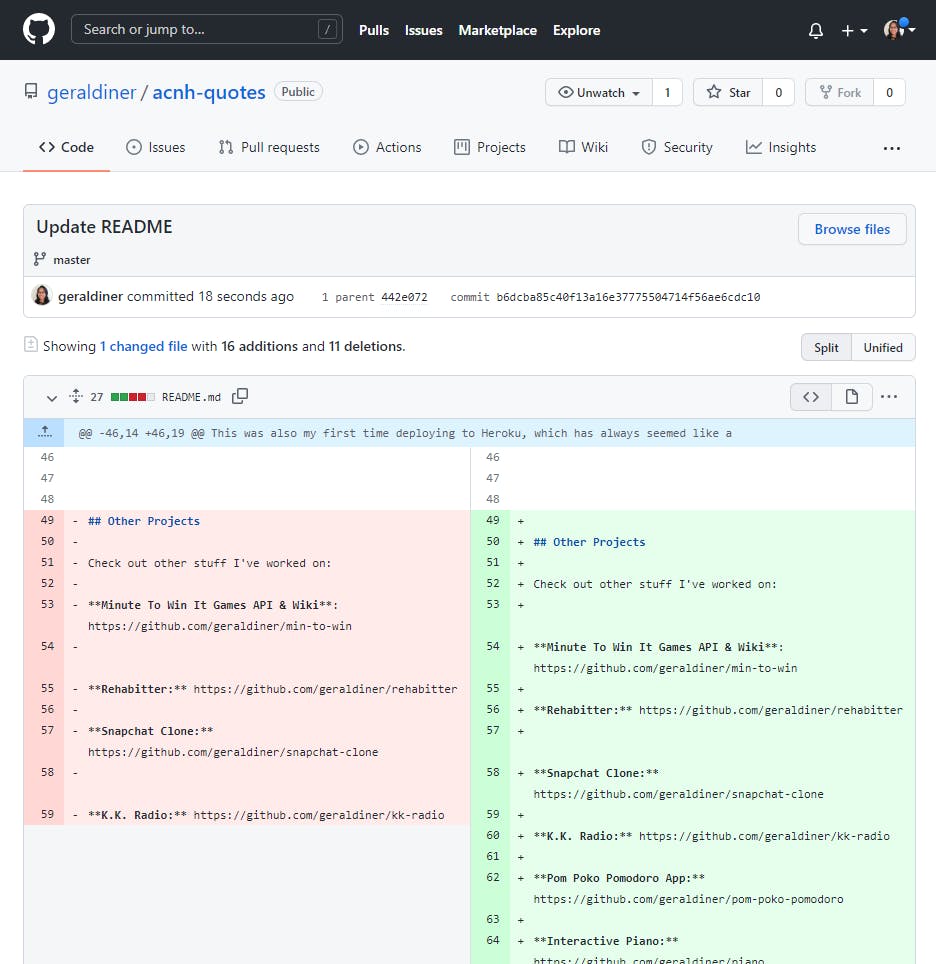
Wrapping Up
And that's it! Now you have a single file that can be used to update a bajillion other files!
If you need to see the full code source, check out my repo for it.

I hope you learned as much as I did about GitHub Actions. It makes me curious about a whole bunch of other automations I could create, like the one that autogenerates the GitHub Profile README.
If you have any questions or need some help, please feel free to reach out.
Happy coding~ ✨
Thanks for reading!
💖 Geraldine | Say hi on Twitter 👋🏾 @geraldinedesu

This post was put together as if rearranging furniture. I had to move around the different pieces to make sure the step-by-step instructions were logical and easy to follow.
Source: Giphy